Update: Check out my updated Tubeless Fatbike Guide for the non-split tube method. The method shown below is still relevant, and may be more reliable in situations where bead retention is of greatest concern, such as on rough rocky trails. The non-split tube method described in the guide mentioned above is a little lighter. For the most reliable tubeless system, consider adhering the split-tube to the tire bead to create an airtight unit, much like a tubular tire. (2/16/2014)
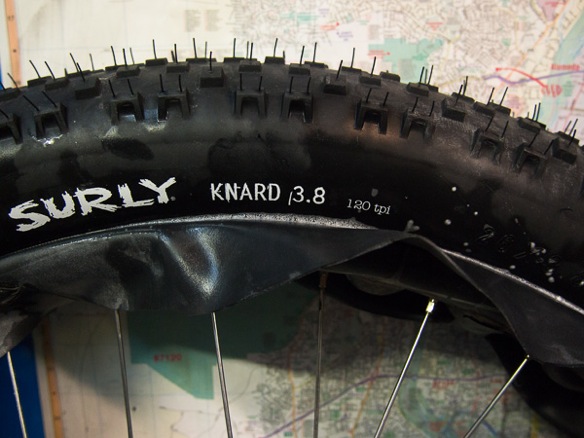
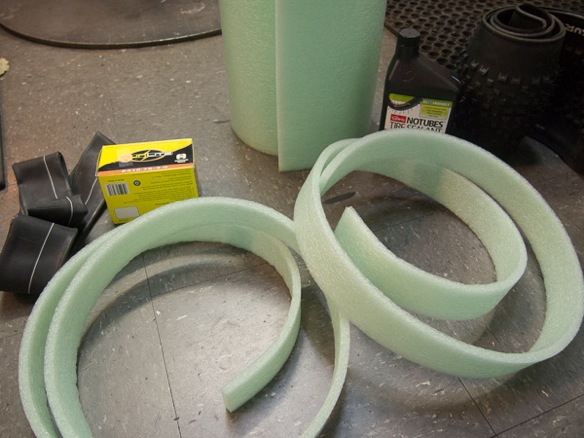
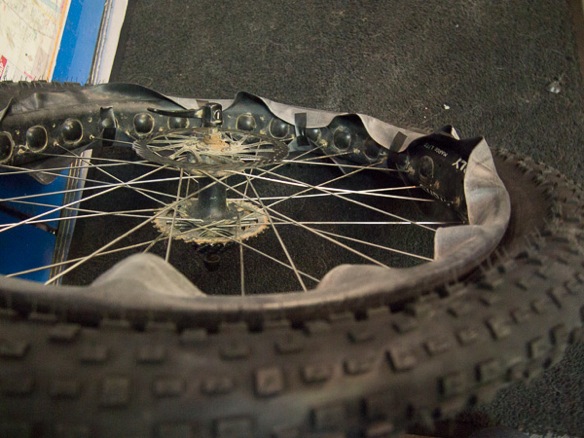
This is not an official guide to fatbike tubeless set-up. Plenty of resources are available online and depending upon your equipment (tires and rims) and the tools at your disposal (including a compressor), there are multiple approaches. This video is useful, and there is plenty of info to start with on this thread. For use with almost any wheel and tire combination, the “ghetto” tubeless system is preferred for its reliability. In short, a standard tube is cut into a rimstrip with the valve intact. It is laid over the rim, and the tire is mounted over top. The tire is inflated with a compressor to ensure that it “catches” the air. If inflated too slowly, air may seep out from under the bead and the tire will remain limp. Once the tire has seated onto the rim, the valve core is removed and liquid sealant installed to fill any micro-gaps in the system and to line the inside of the tire. Some sealant will remain liquid to fill future punctures– this is the greatest value to me in the prickly southwest. Each wheel lost about a half-pound of weight.
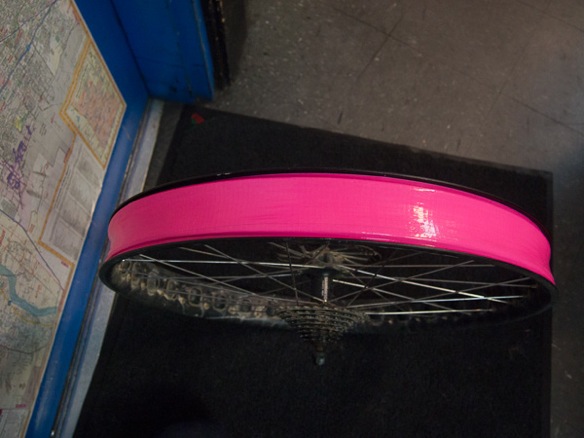
Fatbike tires are variable in dimension– some fit very tight to the rim, and some are loose. To ensure a tight fit, a layer of foam was installed with duct tape to fill the cavity of the Surly Marge Lite rim. I found a $10 sleeping pad at a camping and hunting superstore. Similar product can be sourced from a home improvement center. With the foam in place the tire was challenging to install onto the rim, but it easily held air and could have been inflated with a standard floor pump. A compressor was used.
Pink duct tape was all I could find at the local drug store. Stan’s sealant is preferred. A 24×2.7-3.0″ tube was cut for the rimstrip, although a similarly wide 20″ tube may fit tighter. The rim was drilled for Shraeder valve. Jeff from Two Wheel Drive was invaluable to the success of this project.


Mounted, uninflated:

The tire is seated. The white foam is window cleaner, used to help the bead slide into place under pressure. Remove the valve core and inject liquid sealant into the tire. Reinstall the core and inflate to pressure. I used about 6 oz. of Stan’s sealant per wheel and inflated the tires to 40psi to ensure that they would roll nice and round.

Carefully trim the excess tube with a blade.

Heavy, but a bit lighter. More importantly, I can safely crawl through the desert without fear of punctures. Each wheel weighs about 7 lbs 12 oz (3.5 kg) with tires, cassette, and rotors. The front hub is a Shimano dynamo hub with a 203mm rotor.

Thanks to Trevor at Surly for the lovely tires– folding 120tpi 26×3.8″ Surly Knards.


Knard indeed. Those tires and the Pugsley should certainly be up to the task of exploring your sky-sourced trails. You may be in New Mexico longer than planned.
I’ve had better luck with the ghetto system than using Stan’s (rim strip) system- as far as burping- but nothing has been as good as Stan’s rims. Not an option for you, I know. I haven’t needed to use the foam when I’ve done ghetto on the rims/tires I’ve used on 29ers.
Tubeless is love-hate for me, I love what it does but it discourages one to use different tires for different conditions, it’s not quick and easy to change tires.
You probably know, (?) QBP has tubes with removable presta cores so you can add sealant.
I absolutely need it around here to enjoy trails. Even worse, the ride across town is most often when I find goatheads. For a bike like the Pugs it’s easy to leave the same tire mounted for a while, but it could be a challenging commitment on another bike. I really like tires and appreciate experimenting with new rubber.
For now, I’m really happy with the Mondial and Dureme on the Campeur. It’s a great volume for riding around town, including a quick loop on the Bosque or into the hills for the weekend. Still, bigger is better.
You’ll have to tell us about the ride quality. Although I haven’t tried tubeless on fat tires, I’ve personally found that tubeless on a rigid bike feels too bouncy on technical trails, even with heavier-cased tires like Specialized Grids at ~20 psi. It seems like the extra mass of the tube acts like a rebound damper. I’ll be interested to hear your take, especially with the 120 tpi Knards.
I often run lower pressures than other riders precisely to avoid the bouncy feeling, even on standard width tires or touring tires. Even on a proper “touring” type tire (1.75-2.0″), I like how lower pressures smooth the surface of dirt roads.
I have never pinch-flatted the Pugsley, although I have kissed the rim a few times. Still, the tubeless setup will allow me to confidently keep my pressures low even in rocky sections. I will update when I have some more time on the new tire system.
Any reason you chose Shraeder over Presta? Availability in 24in, or easier to get sealant in?
I think tubeless and fully rigid work great together. Allows you to run lower pressures, especially at the front. Lots more comfort, and extra grip too.
No real reason as I’ve never had any real issues with Presta. I just thought it suited the Bikapocalypse aesthetic of this bike, and it may be practical should I ever travel to the middle of nowhere where I will probably have to hearth braze my steel frame back together and Presta valves have never been seen before. More importantly, Two Wheel had some really big 24″ tubes with Schraeder valves that made installation easier.
They comment in the video linked above that the Schraeder will allow a larger volume of air to flow into the system which forces the tire to seat quicker. I like the bikapocalypse rationale better though.
Gypsy, I liked this post. Thanks. What do you think is better for this application, 24″ or 20″ split tubes. Also, what is your opinion about using wire beaded Surly tires. Also, I am using holy Rolling Daryls. Any concerns there? Any other advise would be greatly appreciated. Thank you for your time.
I’ve mounted a wire-bead Nate, no problem. 20″ tubes are best, as they fit tighter and allow easier tire mounting. Maybe a little lighter too. For 100 rims, a 2.75-3.0″ tube is necessary, something a little smaller may work on Darryl, but these big ones would be best. I know for sure that Sunlite tubes are available in this size (Schrader valves, from J&B Importers). Off to work, let me know if you have any more questions.
I am posting a Moonlander tubeless guide today.
Thanks, Gypsy.
I’ve read a few different blogs and that has to be one nice tubeless conversion. I just might give it a go.